Posted on

Elegant Home and Garden Ideas for Inspired Living Spaces

Home and Garden

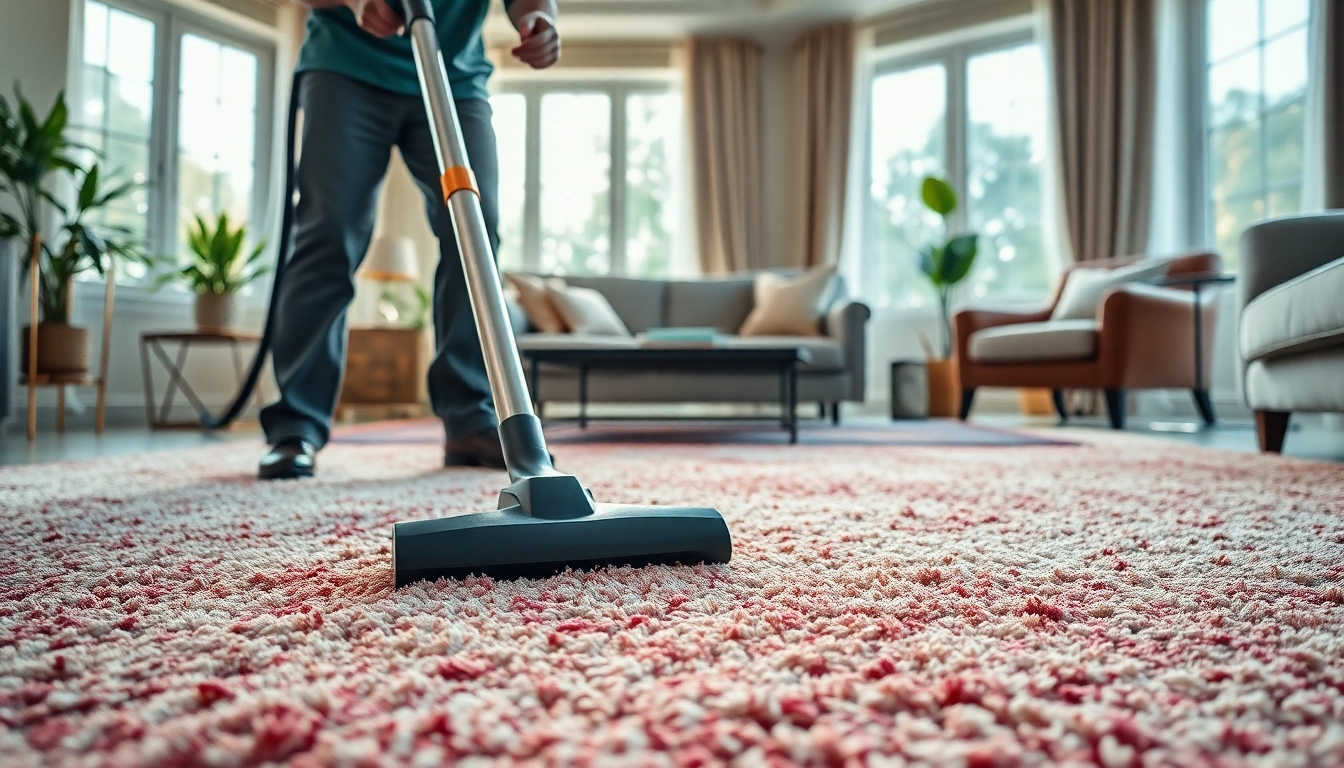
Essential Home Maintenance Tips

Homeownership comes with its fair share of responsibilities, and regular maintenance is crucial to ensure your home remains a safe, functional, and welcoming space. From seasonal tasks to knowing how to tackle common repairs, being proactive can save homeowners time and money in the long run. Below are essential home maintenance tips that every homeowner should consider.

Seasonal Home Maintenance Checklist

Maintaining your home is an ongoing process that can differ significantly from season to season. By creating a seasonal maintenance checklist, you can stay on top of necessary tasks and avoid more significant repairs down the line. Here’s a breakdown of essential tasks for each season:

  • Spring:
    • Inspect the roof for any damage and clean gutters to prevent water damage.
    • Check for signs of pests and treat your home accordingly.
    • Service your HVAC system to ensure it’s ready for warmer months.
  • Summer:
    • Inspect and clean outdoor furniture and grills.
    • Check the irrigation system and adjust for watering needs.
    • Inspect decks and patios for wear and perform necessary repairs.
  • Fall:
    • Clean gutters and downspouts to prepare for winter.
    • Check windows and doors for any drafts and weatherproof as needed.
    • Inspect and service your heating system in preparation for colder weather.
  • Winter:
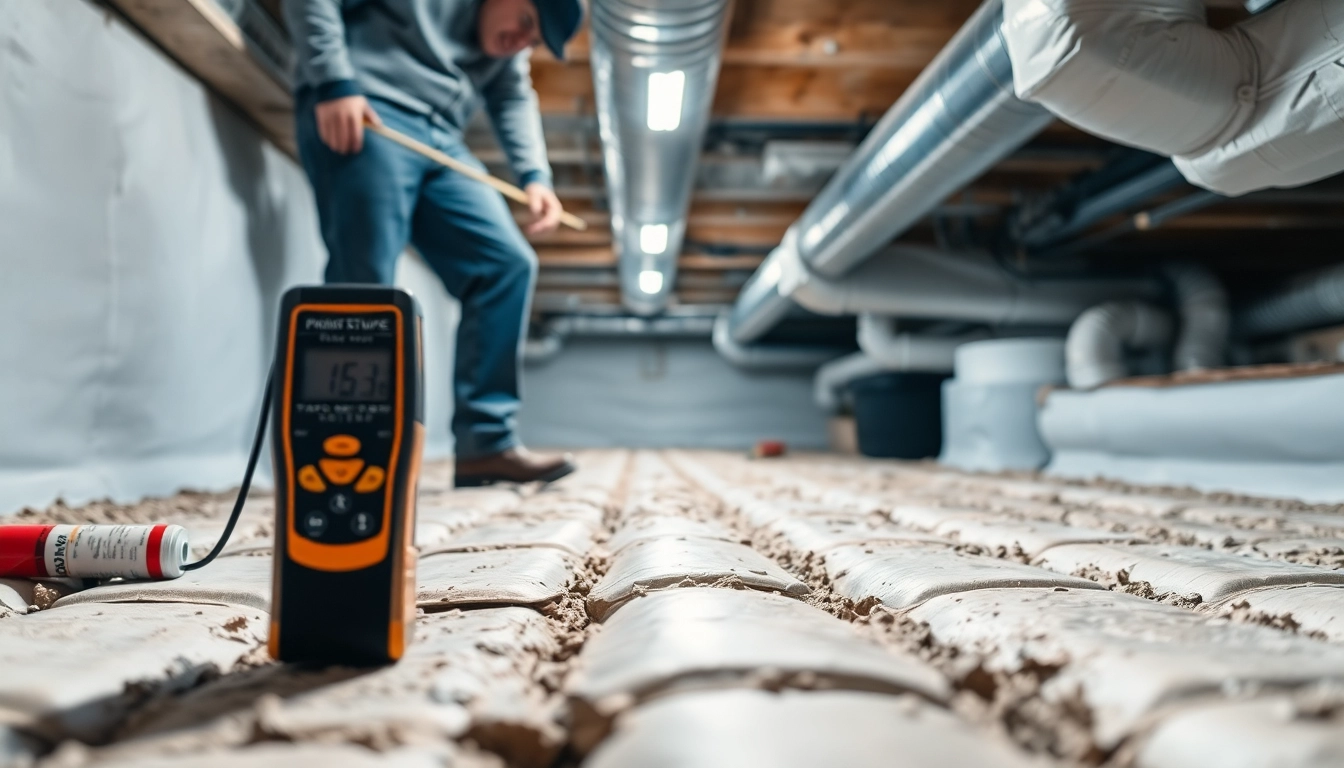
    • Inspect insulation in attics and basements to ensure energy efficiency.
    • Check for ice dams on your roof and remove snow buildup.
    • Test smoke and carbon monoxide detectors.

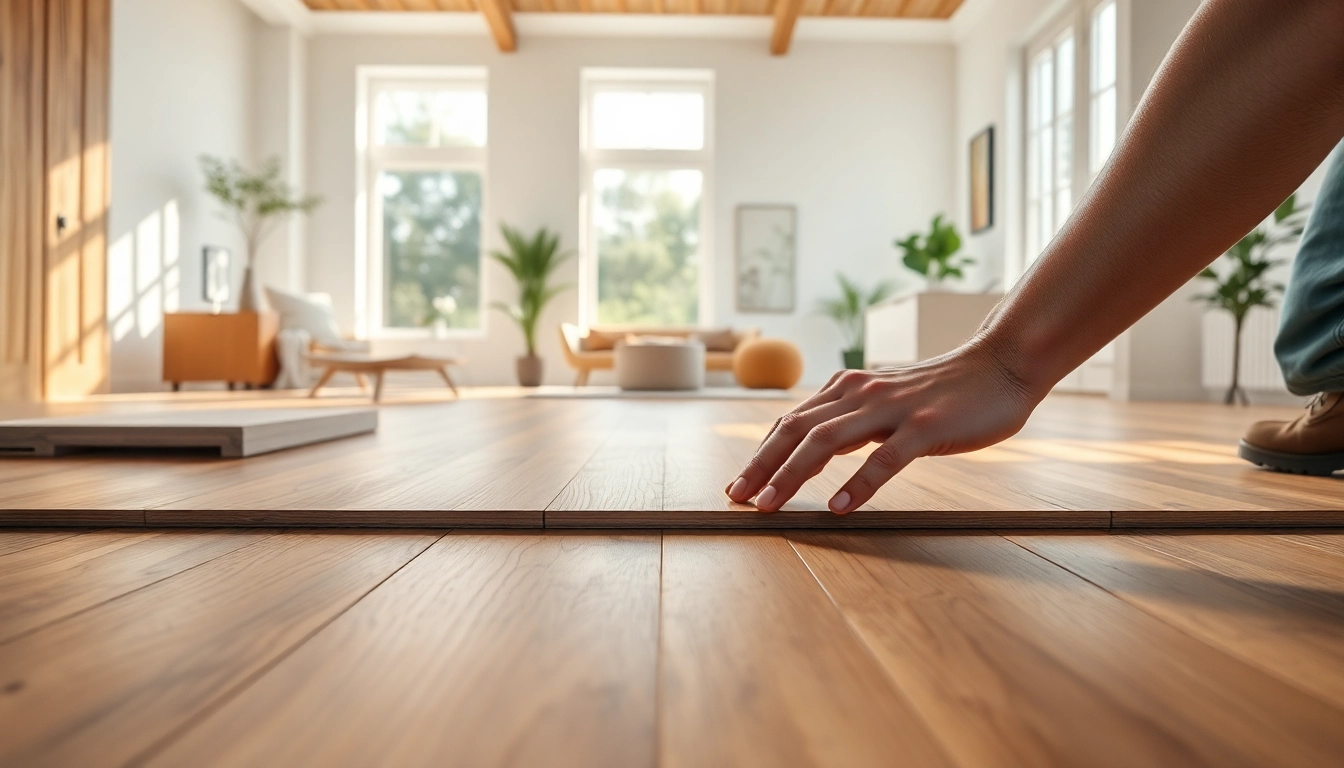
Common Repairs Every Homeowner Should Know

Understanding how to handle common repairs can empower homeowners and save on repair costs. Here are several essential repairs you should be familiar with:

  • Fixing Leaky Faucets: Most leaks can be fixed by replacing washers or O-rings. Start by turning off the water supply, disassembling the faucet, and replacing the worn parts.
  • Patch Small Holes in Walls: Use spackling paste for small holes. Apply it with a putty knife, let it dry, and then sand it smooth before repainting.
  • Unclogging Drains: A plunger can often clear minor clogs. For more stubborn blockages, a plumbing snake or a mixture of baking soda and vinegar can be effective.
  • Replacing Light Fixtures: Always turn off the power before replacing fixtures. Unscrew the old fixture and follow the manufacturer’s instructions for installation.

Tools Every Homeowner Should Have in Their Toolkit

Having the right tools on hand can make home repairs and maintenance much simpler. Here’s a list of essential tools every homeowner should have:

  • Basic Hand Tools: A hammer, screwdriver set, pliers, and adjustable wrench are essential for most repairs.
  • Measuring Tools: A tape measure and level are crucial for accurate measurements and ensuring items are hung straight.
  • Power Tools: A cordless drill and circular saw can expedite many projects, from assembling furniture to building shelves.
  • Safety Gear: Always wear safety goggles and gloves when performing repairs to protect against injuries.

Gardening Basics for Beginners

Gardening can be an incredibly rewarding hobby, providing not just beautiful landscapes but also fresh produce and herbs. For beginners, understanding the basics is crucial for a successful gardening experience. Here are fundamental principles every novice gardener should know.

Choosing the Right Plants for Your Climate

Understanding your local climate is essential in selecting plants that will thrive in your garden. Here are some tips for choosing the right plants:

  • Know Your USDA Plant Hardiness Zone: This zone indicates which plants are likely to survive and thrive in your area based on average winter temperatures.
  • Consider Sunlight Requirements: Some plants require full sun, while others thrive in partial shade. Assess the sunlight availability in your garden before selecting plants.
  • Native Plants: Consider incorporating native plants, as they are adapted to your local climate, require less maintenance, and support local wildlife.

Soil Preparation and Fertilization Techniques

Soil health is fundamental to successful gardening. Here are steps to prepare your soil and fertilize effectively:

  1. Test Your Soil: Use a soil testing kit to determine pH levels and nutrient content. This will guide your amendments.
  2. Amend Your Soil: Based on test results, add organic matter such as compost to improve soil structure and fertility.
  3. Fertilization: Use slow-release fertilizers or organic options like fish emulsion to nourish your plants throughout the growing season.

Watering and Irrigation Best Practices

Proper watering is crucial for plant health. Here are best practices to ensure your garden receives adequate moisture:

  • Deep Watering: Water deeply but less frequently to encourage deep root growth. Aim for about 1 inch of water per week, depending on rainfall.
  • Morning Watering: Watering in the morning minimizes evaporation and fungal diseases, allowing plants to absorb moisture effectively.
  • Drip Irrigation: Consider installing drip irrigation systems for efficient water delivery directly to the plant roots, conserving water and reducing weed growth.

Interior Design and Decor Strategies

Creating a beautiful and functional home involves thoughtful interior design and decor. Here are strategies to enhance your living space.

Color Theory: Choosing the Right Palette for Your Home

Color plays a pivotal role in setting the mood of a room. Understanding color theory can help you choose the right palette:

  • Warm Colors: Reds, oranges, and yellows create an energetic atmosphere and are suitable for social spaces.
  • Cool Colors: Blues, greens, and purples promote tranquility, making them ideal for bedrooms and relaxation areas.
  • Neutral Colors: Whites, grays, and browns serve as a versatile background, allowing you to incorporate accents and textures.

Maximizing Space: Furniture Arrangement Tips

Effective furniture arrangement can enhance both functionality and aesthetics in your home:

  • Define Areas: Use rugs to define different areas within an open space, creating a sense of order.
  • Flow and Accessibility: Ensure furniture placement allows for easy movement throughout the space. Aim for at least 18 inches of walking space between pieces.
  • Scale and Proportion: Choose furniture that fits the scale of the room. Overly large furniture can make a space feel cramped.

Incorporating Personal Touches in Home Decor

Your home should reflect your personality and style. Here are ways to incorporate personal touches:

  • Artwork: Display personal photography or artwork that resonates with you and complements your decor style.
  • Sentimental Items: Incorporate heirlooms or gifts from loved ones to create a meaningful atmosphere.
  • Color Accents: Use throw pillows, blankets, or decor items in your chosen color palette to add character to your space.

Advanced Gardening Techniques

Once you’ve mastered the basics, you may want to explore advanced gardening techniques to enhance your gardening skills and yield. Here are some recommended practices:

Organic Gardening: Principles and Benefits

Organic gardening focuses on sustainable practices that enhance the health of the ecosystem. Here are principles and benefits:

  • No Synthetic Chemicals: Avoid synthetic fertilizers and pesticides, opting for natural alternatives to protect the environment and your health.
  • Biodiversity: Incorporate a variety of plants to foster a balanced ecosystem, which can help deter pests naturally.
  • Soil Health: Emphasize composting, crop rotation, and cover cropping to maintain soil vitality and fertility.

Companion Planting for Pest Management

Companion planting involves grouping plants that benefit each other, particularly in pest management:

  • Tomato and Basil: Basil can repel tomato hornworms while enhancing the flavor of tomatoes.
  • Marigolds: Planting marigolds can deter nematodes and attract beneficial insects.
  • Cabbage and Dill: Dill can attract beneficial wasps that prey on cabbage pests.

Creating a Sustainable Garden Ecosystem

Creating a sustainable garden ecosystem involves fostering a balanced environment that supports both plants and wildlife:

  • Plant Diversity: Incorporate a mix of flowers, shrubs, and trees to attract pollinators and beneficial insects.
  • Water Conservation: Utilize rain barrels to collect rainwater for irrigation, reducing reliance on municipal water systems.
  • Mulching: Apply organic mulch to conserve moisture in the soil, suppress weeds, and improve soil health as it decomposes.

Outdoor Living Spaces: Enhancing Your Garden

Outdoor living spaces can significantly extend your home’s usable area, providing a relaxing environment for gatherings and personal retreat. Here are tips for enhancing your garden space.

Designing Functional Outdoor Areas for Relaxation

Creating a functional outdoor area involves thoughtful planning and design:

  • Seating Arrangements: Choose comfortable, weather-resistant furniture to encourage relaxation and socialization.
  • Shade Solutions: Incorporate umbrellas, pergolas, or shade sails to provide respite from the sun.
  • Outdoor Rugs: Use outdoor rugs to delineate spaces and add warmth and comfort to your outdoor areas.

Incorporating Water Features and Lighting

Water features and lighting can enhance the ambiance of your outdoor space:

  • Fountains and Ponds: Water features can create a calming atmosphere while attracting wildlife such as birds and butterflies.
  • Outdoor Lighting: Use solar lights, string lights, or lanterns to create a cozy ambiance for evening gatherings.
  • Pathway Lighting: Illuminate pathways with low-voltage lighting to enhance safety and aesthetics.

Building a Sustainable Landscape with Native Plants

Incorporating native plants into your landscape design can promote biodiversity and sustainability:

  • Low Maintenance: Native plants are adapted to local conditions, requiring less water and maintenance than non-native species.
  • Wildlife Habitat: Native plants provide habitat and food for local wildlife, including birds, butterflies, and beneficial insects.
  • Soil Conservation: Native plants help prevent soil erosion and improve soil health through their root systems.
Posted on

Elevate Your Home with the Milton Colonial Addition Renovation

Showcase of Milton Colonial Addition Renovation featuring elegant wooden beams and landscaped gardens.

Understanding the Milton Colonial Addition Renovation

The Milton Colonial Addition Renovation is an opportunity to enhance the charm and functionality of the classic Colonial home. This type of renovation involves adding space while maintaining the aesthetic integrity of the architectural style. By embracing traditional elements along with modern updates, homeowners can create a seamless blend of old and new. This article delves into various aspects of the Milton Colonial Addition Renovation, providing comprehensive insights to effectively guide your renovation journey. For a closer look at a stunning project, check the details on the Milton Colonial Addition Renovation.

What is a Colonial Addition?

A Colonial addition refers to a building extension that complements the existing features of a Colonial-style home. Typically characterized by symmetrical facades, gabled roofs, and classic detailing, Colonial homes convey a sense of timelessness. An addition can serve various purposes: providing extra living space, enhancing curb appeal, or creating functional areas that the original design did not accommodate. Through careful design and planning, Colonial additions can increase not only the usability of the space but also the overall value of the property.

Key Features of Milton Colonial Additions

Milton Colonial Additions typically exhibit features that reflect the original architecture while incorporating modern design elements. Key features include:

  • Symmetrical Design: Maintaining a balanced appearance that honors the Colonial style.
  • Classic Materials: Use of brick, wood, and stone to resonate with the existing structure.
  • Traditional Rooflines: Introducing gabled or hipped roofs to enhance the overall silhouette.
  • Windows and Doors: Retaining original window styles, often double-hung, to preserve authenticity.
  • Porches and Porticos: Incorporating front porches that invite and connect to the outdoors.

Benefits of Renovating Your Colonial Home

Renovating your Colonial home can yield numerous benefits. Firstly, it maximizes living space while preserving historical aesthetics. Families can enjoy modern conveniences such as larger kitchens or additional bathrooms without compromising the home’s character. Moreover, updating fixtures, insulation, and energy systems enhances comfort and energy efficiency. Lastly, well-executed renovations can significantly increase property value, making it a wise investment for current and future homeowners.

Design Elements of Milton Colonial Addition Renovation

Materials and Finishes

The selection of materials and finishes plays a pivotal role in the success of the Milton Colonial Addition Renovation. To maintain architectural integrity, it’s essential to choose high-quality materials that echo the original home’s aesthetics. Typical materials include:

  • Wood: Natural wood beams, siding, and trim offer an authentic look.
  • Brick: Classic red or painted brick that aligns with the home’s facade.
  • Stone: Tumbled stone for foundations or accents that provide earthy character.
  • Paint Palettes: Subtle and classic colors that enhance, rather than distract from, the Colonial style.

Proper finish selection, whether it’s matte or glossy, can also impact the visual outcome and energy conservation of the home.

Layout and Space Optimization

Effective layout design in your Colonial addition can significantly improve functionality. Consider making use of open-plan layouts in areas such as kitchens and family rooms. By removing non-load-bearing walls, you can create spacious environments that encourage family interaction. Additionally, incorporating built-in shelving or multi-purpose furniture can help in optimizing small areas. Always consult with a designer to ensure a cohesive flow throughout the existing spaces.

Incorporating Modern Amenities

While preserving the historical essence of your home, integrating modern amenities is essential for enhanced living. Consider incorporating smart home technology, state-of-the-art appliances, and contemporary lighting fixtures. Bathrooms can benefit from features like rain showers and energy-efficient toilets, providing luxury and sustainability. As you navigate these updates, aim for a harmonious blend that respects the characteristics of the Colonial home while infusing modern convenience.

Planning Your Milton Colonial Addition Renovation

Steps for Effective Renovation Planning

A well-structured plan is crucial for a successful renovation. Begin by outlining your goals—are you looking to expand living space, improve functionality, or enhance aesthetics? Following this, create a timeline detailing each phase of the project, from conceptual design to final inspection. Be sure to involve professionals early in the planning to ensure that all additions comply with local regulations and fit seamlessly with the existing structure.

Budgeting for Your Project

Budgeting is a critical aspect that can determine the scope and quality of your renovation. Start by researching costs associated with different elements of the renovation, including materials, labor, permits, and unforeseen expenses. A common guideline is to keep a contingency fund of at least 15% of the total budget to accommodate surprises. Organizations may offer budgeting tools or templates that can be beneficial in tracking expenses against the planned budget.

Choosing the Right Professionals

Selecting the right team is vital for ensuring a smooth renovation process. Look for experienced architects and contractors who specialize in the renovation of Colonial homes. Evaluate their past projects and client testimonials to gauge their suitability. Opening a dialogue about design ideas, budget constraints, and timelines will help establish a cohesive vision moving forward. Consider working with a project manager if your renovation involves multiple professionals, as this can facilitate communication and efficiency.

Sustainability in Milton Colonial Addition Renovation

Eco-Friendly Materials and Practices

Incorporating sustainability into your Milton Colonial Addition Renovation provides environmental benefits and can reduce long-term costs. Choose eco-friendly materials such as reclaimed wood, recycled brick, and low-VOC paints. Implementing practices like responsibly sourcing materials not only minimizes environmental impact but can also lead to historical preservation credits in some regions. Partnering with suppliers who emphasize sustainable sourcing can streamline this process.

Energy Efficiency Upgrades

Integrating energy efficiency into your renovation can dramatically decrease energy consumption. Insulation upgrades, energy-efficient windows, and modern heating and cooling systems will enhance comfort while lowering utility bills. Solar panels could also be considered, depending on the location and climate. An energy audit before beginning the renovation can help outline areas that require improvement.

Long-term Benefits of Green Design

Emphasizing sustainable design goes beyond initial execution, as it yields long-term benefits. Homes designed with sustainability in mind often retain higher market values and appeal to environmentally conscious buyers. Additionally, energy-efficient upgrades lead to substantial savings on energy bills over time, offering financial relief. This focus on longevity contributes to a healthier living environment both inside and out.

FAQs about Milton Colonial Addition Renovation

How long does a Colonial addition renovation typically take?

The duration of a Colonial addition renovation can vary based on the project’s complexity. Generally, a timeline could range from three to six months, including planning and construction phases.

What permits are necessary for a renovation?

Permits for renovations typically include building permits, zoning permits, and possibly historical approval. Local regulations will dictate the specific requirements needed.

Can I stay in my home during the renovation?

Whether you can stay depends on the scope of the project. Smaller renovations may allow for occupancy, while major additions often necessitate temporary relocation for safety reasons.

What are the costs associated with a Milton Colonial Addition?

Costs can vary greatly based on size, materials, and labor. On average, homeowners can expect to invest between $100 to $300 per square foot for a renovation of this nature.

How do I ensure my renovation matches the original design?

Work closely with architects who specialize in Colonial architecture. Maintaining a cohesive design involves adhering to original materials and architectural features throughout the renovation.

Posted on

Stunning Elements of Winchester Foursquare Revival Architecture

Showcasing Winchester Foursquare Revival, this beautiful house stands amidst a lush garden.

Introduction to Winchester Foursquare Revival

The Winchester Foursquare Revival stands as a notable representation of American architectural heritage, merging practicality with aesthetic appeal. This style encapsulates a unique blend of form and function, presenting a boxy structure that is inviting and efficient. As neighborhoods evolve and design trends shift, the Foursquare Revival continues to resonate due to its timeless qualities and historical significance.

Understanding Its Historical Context

Originating in the early 20th century, the Foursquare Revival is an architectural style that draws inspiration from earlier movements such as Arts and Crafts, and the more traditional Colonial styles. It rose to prominence during a period when homeowners sought functional living spaces that did not compromise on beauty. The revival of this pattern in contemporary architecture signifies a longing for simpler, more grounded lifestyles, often reflecting nostalgia for a more connected past.

During the peak of its popularity, the style was characterized by its focus on horizontal lines, robust nature, and efficient use of space. Elements such as substantial porches and symmetrical layouts provide balance and harmony, allowing individuals to connect with the world outside their homes.

Key Architectural Features

The Winchester Foursquare Revival is easily identifiable by several distinguishing features. A square shape dominates the structure, providing ample room for practicality while exuding a sense of stability. Broad, overhanging eaves, often adorned with decorative brackets, contribute to the aesthetic charm, while extensive porches invite social interaction and outdoor living.

Large windows, predominantly with multiple panes, enhance natural light, creating an uplifting atmosphere within. The interiors typically exhibit an open floor plan, emphasizing spaciousness, functionality, and the seamless connection between living spaces. This layout supports modern lifestyles, catering to diverse family needs and fostering social engagement.

Relevance in Current Design Trends

As the architectural landscape shifts toward sustainability and simplicity, the Winchester Foursquare Revival is increasingly relevant. Modern homeowners appreciate its ability to blend traditional aesthetics with contemporary functionality. This revival not only encourages sustainable practices by promoting efficient use of space and natural light but also creates homes that cater to today’s need for comfort and togetherness.

Incorporating modern amenities within the classic framework allows the Foursquare Revival to evolve without losing its historical essence. Today’s architects increasingly draw inspiration from this style, showcasing how it can coexist harmoniously with innovative materials and environmentally friendly designs.

Distinctive Characteristics of Winchester Foursquare Revival

Layout and Spatial Arrangement

The layout of a typical Winchester Foursquare Revival is both logical and flexible, designed to cater to a variety of lifestyles. The central foyer often acts as a hub, leading to the living area, dining room, and kitchen, promoting connectivity within the home. This open-concept approach resonates with current trends that favor social spaces, allowing families and guests to move freely.

Furthermore, the upstairs typically features well-proportioned rooms that can serve multiple purposes – ideal for family expansion or home office needs, reflecting modern demands for adaptability in living spaces.

Building Materials and Styles

Traditionally, the materials used in Winchester Foursquare Revival homes leaned toward durability and natural aesthetics. Wood, brick, and stone became staples, each choice reflecting a commitment to craftsmanship and authenticity. The woodwork often exposes its grain, bringing warmth and a sense of nature indoors, while brick and stone facades provide stability and aesthetic appeal.

Different variations of the style can also incorporate shingle siding for a textured look, while stained glass and intricate woodwork elements lend a distinctive character. The careful selection of materials underscores the essence of this style – reflecting nature while creating an inviting atmosphere.

Craftsmanship and Details

Exceptional craftsmanship is a hallmark of the Winchester Foursquare Revival. Attention to detail is evident in features such as built-in shelving, ornate moldings, and handcrafted railings. These elements not only enhance the aesthetic value but also resonate with the notion of ‘Home,’ creating spaces that reflect personal stories and values.

Moreover, the use of decorative elements, such as corbels and brackets, showcases the seamless integration of form and function in the architectural design. Craftsmanship in this sense represents the fusion of skill and passion, instilling a sense of pride in homeowners and builders alike.

Landscape Integration with Winchester Foursquare Revival

Garden Designs Complementing Architecture

A crucial aspect of the Winchester Foursquare Revival is its interplay with surrounding landscapes. The design encourages homeowners to create gardens that reflect the home’s architectural character. Landscaping often includes well-manicured lawns, flowering shrubs, and herb gardens that enhance the home’s appeal while inviting nature closer to living spaces.

Elements like stone paths and wooden trellises seamlessly transition between the home and gardens, promoting a unified aesthetic. Native plants are often favored, enhancing sustainability and community ecology.

Importance of Surroundings

The relationship between a home and its surroundings is essential in enhancing the broader appeal of the Winchester Foursquare Revival. Homes are often strategically positioned to take advantage of natural light and scenic views, further solidifying the connection to the environment.

Furthermore, incorporating outdoor living areas can expand the usable space, allowing families to engage with nature while enjoying the comforts of their home. Porches and patios not only serve as recreational zones but also as social areas where families can gather and connect.

Using Natural Elements Effectively

Naturally occurring elements play a vital role in accentuating the Winchester Foursquare Revival. Utilizing local materials in landscaping can foster a stronger connection to the locale and reduce environmental impact. Natural stone pathways, wooden arbours, and water feature designs create focal points that attract interest, ensuring that the landscape complements the architectural style.

The thoughtful placement of trees and shrubs provides shade, privacy, and aesthetic value, allowing homeowners to expand the functionality of their spaces while remaining in harmony with nature.

Designing Modern Spaces Inspired by Winchester Foursquare Revival

Creating Functional Interiors

Designing interiors inspired by the Winchester Foursquare Revival begins with maximizing functionality. Open floor plans create a fluid relationship between rooms, promoting movement and encouraging family interaction. Multi-functional furniture pieces further enhance space efficiency, serving diverse purposes without compromising aesthetics.

Considerations for modern technology, such as integrated smart systems, can be seamlessly woven into traditional designs, creating environments that cater to today’s needs without detracting from historical characteristics.

Balancing Tradition with Modern Needs

As modern lifestyles evolve, striking a balance between tradition and modern capabilities becomes paramount. Winchester Foursquare Revival, with its strong historical roots, serves as a robust framework to incorporate modern elements. For example, open spaces can be adorned with contemporary artwork or furnishings that exhibit clean lines, integrating modern minimalist aesthetics without overshadowing the traditional framework.

Moreover, energy-efficient appliances and sustainable building practices can reflect a commitment to environmental stewardship while respecting the integrity of the design.

Material Choices for Authenticity

Retaining authenticity while pursuing modern design requires careful selection of materials. Emphasizing natural and sustainable materials can encapsulate the essence of the Winchester Foursquare Revival. For instance, reclaimed wood can offer a rustic touch while maintaining environmental consciousness.

Additionally, opting for finishes that exhibit craftsmanship, such as handmade tiles and artisan-crafted fixtures, reinforces the home’s character and enhances the overall appeal.

FAQs about Winchester Foursquare Revival

What defines the Winchester Foursquare Revival style?

The Winchester Foursquare Revival is characterized by its boxy shape, broad eaves, and extensive porches, emphasizing simplicity and functionality.

How can I incorporate Winchester Foursquare Revival elements in my own home?

Focus on open floor plans, large windows, and the use of natural materials to capture the essence of this architectural style.

Is Winchester Foursquare Revival suitable for modern living?

Yes, this style can be adapted to modern living by blending traditional elements with contemporary amenities.

What are the common materials used in Winchester Foursquare Revival?

Common materials include wood, brick, and stone, allowing for durability while maintaining a classic aesthetic.

How does landscaping enhance Winchester Foursquare Revival homes?

Effective landscaping enhances the home’s charm by creating a harmonious relationship between green spaces and architectural features.

Posted on

Choosing the Right Laminate Flooring: A Comprehensive Guide

Show a professional installing laminate flooring, emphasizing quality and craftsmanship.

Understanding Laminate Flooring

Laminate flooring has gained immense popularity in recent years, providing both aesthetic appeal and versatility for homeowners. Whether you’re remodeling your space or building from scratch, exploring laminate options can be an excellent choice. In this comprehensive guide, we delve deep into what laminate flooring is, its various benefits, and the misconceptions that often surround it.

What is Laminate?

Laminate flooring is an engineered product typically made of a combination of natural wood fibers, a high-density fiberboard core, and a durable outer layer that provides resistance to scratches, stains, and fading. The surface layer is usually a photographic layer that mimics the appearance of wood, stone, or tile, giving the illusion of natural materials. Laminates come in a variety of styles, colors, and finishes that cater to diverse design aesthetics.

Benefits of Laminate Flooring

Laminate flooring offers numerous advantages for homeowners looking to enhance their living spaces:

  • Affordability: Laminate typically costs less than traditional hardwood flooring, making it budget-friendly.
  • Durability: The tough exterior layer resists scratches and dents, making it suitable for high-traffic areas.
  • Easy Installation: Many laminate types feature a click-lock installation method, allowing for quick setup without professional help.
  • Low Maintenance: Cleaning laminate is straightforward; regular sweeping and occasional mopping suffice.
  • Variety of Designs: With various designs, colors, and textures, laminate can emulate high-end materials like hardwood and stone.

Common Misconceptions About Laminate

Despite its popularity, laminate flooring is often misunderstood. Here are some common misconceptions:

  • Laminate is Low-Quality: While it’s not solid wood, laminate is crafted to be durable and appealing.
  • Hard to Repair: Most damage can be addressed with replacement planks or repair kits, making laminate a maintenance-friendly choice.
  • One-Style Fits All: With countless styles and patterns, laminate can suit any decor style, from rustic to modern.
  • Uncomfortable to Walk On: Quality laminates often provide cushioning and warmth, making them comfortable underfoot.
  • Not Eco-Friendly: Many brands now offer sustainably sourced laminate options, appealing to environmentally conscious buyers.

Types of Laminate Flooring

Choosing laminate flooring involves understanding the different types available on the market. Here, we explore the various grades, styles, and eco-friendly options.

Different Grades of Laminate

Laminate flooring is categorized into various grades based on thickness and durability. Common grades include:

  • AC1: Suitable for low-traffic areas like bedrooms, AC1 offers minimal wear protection.
  • AC2: Designed for moderate traffic, making it appropriate for living rooms and dining areas.
  • AC3: Perfect for heavy residential traffic, AC3 is ideal for hallways and kitchens.
  • AC4: Recommended for light commercial spaces, AC4 can handle higher foot traffic.
  • AC5: Suitable for heavy commercial use, AC5 provides maximum durability and resistance.

Popular Styles and Patterns

Laminate flooring is available in an expansive range of styles, including:

  • Wood-Look: Mimicking the appearance of natural hardwood, this style remains amongst the most popular choices.
  • Tile-Look: Offering the look of ceramic or stone tiles, laminate provides the aesthetic without the coldness of traditional tile.
  • Textured Finishes: Textured surfaces can enhance the realism of wood effects and add depth to the design.
  • Pattern Variations: Laminate is available in various patterns, facilitating creative and unique design choices.

Eco-Friendly Laminate Options

As sustainability takes center stage, eco-friendly laminate options have emerged in the market. Look for products made from recyclable materials and those boasting certifications such as:

  • FSC Certification: Ensures responsible forest management and sourcing of materials.
  • Low VOC Emissions: Look for low volatile organic compounds to improve indoor air quality.
  • Recycled Content: Some brands incorporate recycled content into their products, reducing environmental impact.

Installing Laminate Flooring

Installing laminate flooring can be a straightforward process if done correctly. Below is a comprehensive step-by-step guide, including some essential preparation and tools required for installation.

Preparation Steps Before Installation

Proper preparation is vital for a successful laminate flooring installation. Here are the steps to take:

  • Acclimation: Allow laminate planks to acclimate to the room temperature and humidity for at least 48 hours.
  • Subfloor Inspection: Ensure the subfloor is clean, dry, and level. Any imperfections should be fixed prior to installation.
  • Underlayment Choice: Choose an appropriate underlayment that offers soundproofing and moisture barrier properties.
  • Room Layout: Plan the layout of the planks for aesthetic appeal, considering lighting and room shape.

Step-by-Step Installation Process

Follow these steps to install laminate flooring:

  1. Prepare the subfloor and install the underlayment.
  2. Lay the first row of planks, ensuring the tongue and groove fit properly.
  3. Continue laying additional rows, staggering the joints for a natural appearance.
  4. Use spacers along the walls to allow for expansion; the laminate needs room to move.
  5. When you reach the final row, it may require cutting the planks to fit snugly against the wall.
  6. Finish by installing baseboards or trim to cover the expansion gaps.

Tools Required for Installation

To install laminate flooring effectively, ensure you have the following tools:

  • Measuring tape
  • Utility knife
  • Miter saw or circular saw
  • Hammer
  • Spacers
  • Rubber mallet
  • Flooring pull bar
  • Underlayment with moisture barrier

Caring for Laminate Flooring

Maintaining laminate flooring is crucial for longevity and maintaining its appearance. Here’s how to care for your laminate flooring:

Daily Maintenance Tips

Regular maintenance is essential for keeping your laminate floor looking fresh:

  • Sweep or vacuum daily to remove dust and debris.
  • Use a damp mop with a solution specifically designed for laminate flooring.
  • Avoid excessive moisture as it can damage the laminate.
  • Place rugs at entry points to reduce dirt and wear.
  • Use felt pads under furniture legs to prevent scratches.

How to Handle Damage or Wear

In case of scratches, dents, or other wear:

  • Use a laminate repair kit to fill in scratches and chips.
  • If planks are damaged, they can often be replaced without hiring a professional.
  • Keeping extra planks from the original installation can simplify repairs.

Long-Term Care and Best Practices

For long-term care of your laminate flooring, adhere to these best practices:

  • Reapply protective treatments as recommended by the manufacturer.
  • Schedule deep cleanings every few months using proper laminate cleaning solutions.
  • Store seasonal items appropriately to prevent scuffing and damage.

FAQs About Laminate Flooring

What is the lifespan of laminate flooring?

Laminate flooring typically lasts between 15 to 25 years depending on the quality and maintenance.

Can laminate flooring be repaired?

Yes, minor damages can be addressed with repair kits, while planks can be replaced if severely damaged.

Is laminate flooring suitable for kitchens?

Laminate is suitable for kitchens if moisture control measures are observed, as it’s water-resistant but not waterproof.

How do I clean laminate flooring?

Regular sweeping and damp mopping with a manufacturer-recommended cleaner keep laminate flooring clean.

What’s the cost difference between laminate and hardwood?

Laminate is generally cheaper than hardwood flooring, with installation costs also being lower.

Posted on

Expert Insights on Crawl Space Restoration for a Healthier Home

Crawl Space Restoration by a professional in a clean, bright underfloor setting with new vapor barriers.

Understanding Crawl Space Restoration

What is Crawl Space Restoration?

Crawl Space Restoration refers to a comprehensive process that aims to improve, repair, and maintain the structural integrity and environmental quality of crawl spaces in homes. These usually confined areas beneath homes require meticulous attention due to their susceptibility to moisture, pests, and mold, which can compromise the health of your living space. The restoration process can involve cleaning, waterproofing, insulation, and addressing any structural issues identified during inspections. The goal is to create a safe, dry, and well-ventilated environment that will protect your home from damage while enhancing overall quality of life.

Why is Crawl Space Restoration Important?

The importance of Crawl Space Restoration cannot be overstated. A well-maintained crawl space ensures several benefits: it protects your home’s structural elements from moisture damage, prevents pest infestations, and contributes to better indoor air quality. Moreover, unaddressed crawl space issues can lead to higher energy bills, as moisture-laden air can impact your HVAC system’s efficiency. Restoration is not just a preventive measure but a crucial investment for maintaining a home’s value, safety, and comfort.

Key Components of Crawl Space Restoration

Crawl Space Restoration comprises several key components, including:

  • Waterproofing: Implementing barriers and drainage solutions to prevent moisture ingress.
  • Insulation: Installing quality insulation material to regulate temperature and enhance energy efficiency.
  • Ventilation: Ensuring proper airflow to minimize moisture buildup and improve air quality.
  • Pest Control: Taking preventive measures to deter insects and rodents.
  • Structural Repairs: Addressing any physical damage to the foundation or supports.

Signs Your Crawl Space Needs Restoration

Common Indicators of Crawl Space Issues

Being alert to the signs indicating that your crawl space may require restoration is crucial. Look for:

  • Mold Growth: Visible mold or mildew is a clear indicator of excessive moisture.
  • Wood Damage: Rotting wood or sagging beams could signal structural problems.
  • Musty Odors: Persistent odors can suggest fungal growth or pest issues.
  • Temperature Variations: Unusual chilliness in your home could stem from poor insulation in the crawl space.
  • Pest Infestations: Signs of rodents or insects are red flags that should not be ignored.

How to Identify Moisture Problems

Identifying moisture problems in your crawl space is key to effective restoration. Here are a few methods:

  • Visual Inspection: Look for standing water, damp spots, or condensation on walls.
  • Use Moisture Meters: These tools can measure humidity levels in the air and wood.
  • Check Insulation: Wet or compressed insulation can indicate moisture issues.
  • Ventilation Assessment: Assess whether vents are blocked or not functioning correctly.

Impact of Neglecting Restoration

Neglecting to restore your crawl space can have dire consequences not just for the structure but for the overall health of your household. Common impacts include:

  • Structural Damage: Ongoing moisture can rot wood and compromise the foundation.
  • Pest Infestations: Unchecked moisture attracts pests, which can lead to additional damage.
  • Decreased Air Quality: Mold spores and allergens can enter your home, triggering respiratory issues.
  • Increased Energy Costs: Poor insulation and ventilation can lead to higher heating and cooling expenses.

Best Practices for Crawl Space Restoration

Steps to Clean Your Crawl Space

Cleaning your crawl space is the cornerstone of restoration. Follow these steps for effective cleaning:

  1. Clear the Space: Remove debris, old insulation, and any furniture or items stored.
  2. Inspect for Damage: Examine beams and insulation for signs of rot or pest activity.
  3. Address Moisture Issues: Repair leaks and consider installing a dehumidifier if humidity levels are high.
  4. Professional Assessment: Get a professional evaluation for structural issues.

Choosing the Right Materials for Restoration

Selecting appropriate materials is essential for effective restoration. Consider the following:

  • Waterproof Membranes: Durable materials that resist moisture ingress.
  • Insulating Material: Choose materials with high R-value for energy efficiency.
  • Mold-Resistant Sealants: Prevent future fungal growth.
  • Vapor Barriers: Essential for moisture control in crawl spaces.

When to Call a Professional

While DIY efforts can sometimes address minor issues, certain situations warrant professional help. Contact a specialist when:

  • Structural damage has occurred.
  • You find extensive mold growth.
  • You are unsure about the source of persistent moisture.
  • Pest infestations are severe or beyond control.
  • Your attempts at DIY restoration have not yielded results.

Preventative Measures Post-Restoration

Maintaining a Dry and Healthy Crawl Space

Once your crawl space has been restored, regular maintenance is vital. Here are some tips:

  • Keep gutters clean and direct downspouts away from the foundation.
  • Monitor humidity levels regularly; aim to keep them below 50%.
  • Ensure that exterior landscaping slopes away from your home.
  • Use a sump pump if necessary to manage groundwater.

Regular Inspections: What to Look For

Regular inspections are essential to ensure the longevity of your restoration efforts. During inspections, check for:

  • Signs of water intrusion or leaks.
  • Mold growth or musty smells.
  • Pest sightings or droppings.
  • The condition of insulation and vapor barriers.
  • Structural integrity of beams and supports.

Improving Air Quality in Your Home

Restoring your crawl space not only enhances its condition but also improves your home’s overall air quality. Consider these strategies:

  • Install proper ventilation systems to encourage airflow.
  • Use air purifiers to filter dust and allergens.
  • Regularly clean air ducts to prevent mold spores from circulating.
  • Monitor humidity levels and adjust as necessary to avoid damp conditions.

Frequently Asked Questions about Crawl Space Restoration

How often should I perform crawl space restoration?

It’s advisable to inspect your crawl space every 6 to 12 months and conduct restoration as needed, especially if moisture issues are detected.

Can I do crawl space restoration myself?

Basic tasks like cleaning and simple repairs can be DIY, but complex issues like structural damage should be left to professionals.

What are the costs associated with crawl space restoration?

Costs can vary widely depending on the extent of damage and the services provided; most homeowners spend between $1,500 and $15,000.

What materials are best for crawl space restoration?

Use moisture-resistant materials, like waterproof membranes and mold-resistant insulation, designed specifically for crawl space conditions.

Are there health risks associated with a damaged crawl space?

Yes, a damaged crawl space can lead to poor air quality, mold growth, and pest infestations, which can pose health risks to residents.

Posted on

Top Features to Consider When Choosing Your Microwave Oven

Enhance your cooking with the stylish Microwave Oven in a modern kitchen setup.

Understanding the Basics of Microwave Oven Technology

Microwave ovens have transformed the way we cook and reheat food, offering unparalleled convenience and speed. Understanding how these versatile kitchen appliances work is crucial for anyone looking to enhance their culinary skills or optimize their kitchen setup. A Microwave Oven uses electromagnetic radiation to heat food, providing quick access to warm meals with minimal effort. In this section, we’ll explore the intricate workings of microwave ovens, the different types available in the market, and their various applications.

How Microwave Ovens Work

At the core of microwave technology is the generation of microwaves by a component known as the magnetron. These microwaves are electromagnetic waves that oscillate at a frequency of approximately 2.45 GHz. When you place food in the microwave oven and turn it on, the magnetron emits these waves into the cooking chamber.

The microwaves target water molecules in the food, causing them to vibrate rapidly. This vibration generates heat, which cooks or reheats the food. The surrounding environment is designed to reflect these microwaves, allowing for efficient cooking and even heat distribution. This rapid heating capability makes microwave ovens ideal for defrosting, reheating leftovers, and cooking a variety of dishes.

Types of Microwave Ovens

Microwave ovens come in several configurations, each designed to cater to different culinary needs:

  • Countertop Microwave Ovens: These are the most common type, easy to set up and use in any kitchen without extensive installation. They offer versatility in cooking and reheating.
  • Built-in Microwave Ovens: These models are integrated into cabinetry, providing a sleek design. They often come with advanced features and save counter space.
  • Over-the-Range Microwave Ovens: Dual-purpose appliances that act as both a microwave and a range hood. Perfect for kitchens with limited counter space.
  • Convection Microwave Ovens: These combine microwave cooking with convection technology, allowing for browning and crisping of foods.
  • Commercial Microwave Ovens: Designed for heavy-duty use, these are found in restaurants and can handle larger quantities of food.

Common Applications of Microwave Ovens

Microwave ovens are not just limited to reheating food; their applications are diverse and expansive:

  • Reheating Leftovers: Easily revitalize previous meals without the need for stovetops or ovens.
  • Defrosting: Quickly thaw frozen items without compromising texture or flavor.
  • Cooking: Prepare a range of dishes, from simple popcorn to elaborate casseroles, in a fraction of the time compared to conventional cooking methods.
  • Beverage Heating: Warm beverages instantly without boiling over.
  • Food Preparation: Steam vegetables and create quick recipes like microwave mug cakes.

Key Features to Look for in a Microwave Oven

When choosing a microwave oven, understanding its features is paramount to making an informed decision. Here we outline the vital aspects to consider, ensuring you choose a model that aligns with your lifestyle and cooking habits.

Cooking Power and Efficiency

The cooking power of a microwave oven, measured in watts, determines how efficiently it can heat and cook food. Most household models range from 600 to 1200 watts. A microwave with higher wattage cooks food faster and more evenly. For everyday cooking, a microwave oven with 800 to 1000 watts is generally sufficient. If you regularly cook large portions, consider models with 1100 watts or more for optimal performance.

Size and Capacity Considerations

The size and capacity of a microwave oven are crucial, particularly when accommodating your cooking and kitchen space. Standard countertop models typically range from 0.5 to 2.2 cubic feet. Consider your typical meal portions and kitchen layout to find the right fit. If you plan to cook larger dishes, such as casseroles or whole chickens, a model with a bigger capacity is essential.

Control Options and User Experience

Modern microwave ovens come with various control options, from basic dials to advanced touch controls and digital displays. Intuitive control panels can enhance user experience significantly. Look for features such as pre-programmed settings, sensor cooking, and easy-to-read displays. Additionally, features like a child lock are beneficial for households with young children.

Installation and Safety Tips for Your Microwave Oven

Proper installation and adherence to safety protocols are vital to ensure your microwave oven operates effectively and safely. It’s essential to follow certain guidelines to maximize usability and minimize hazards.

Proper Placement and Installation

Ensure your microwave oven is placed on a sturdy surface to withstand daily use. For countertop models, choose a location away from heat sources, and ensure there’s adequate ventilation space around all sides. For built-in or over-the-range models, adhere to the manufacturer’s installation instructions carefully. Maintain a clearance of at least 30 inches above the cooking surface to facilitate ventilation and avoid overheating.

Safety Guidelines When Using Microwave Ovens

Understanding microwave safety is essential for avoiding accidents:

  • Never use metal containers, foil, or objects with metallic accents, as these can spark and cause fires.
  • Always cover food to prevent splattering and maintain moisture, but use microwave-safe materials.
  • Keep the door and seals clean to ensure proper functioning and prevent leakage of microwaves.
  • Stay aware of potential hot spots when removing food; use gloves or potholders to avoid burns.

Maintenance Tips for Longevity

Regular maintenance will ensure your microwave oven remains in optimal working condition:

  • Clean the interior and exterior regularly with a mild detergent and soft cloth.
  • If you notice any unusual sounds or odors, seek professional service to diagnose issues.
  • Periodically check and replace any worn seals or damage to the door to maintain safety features.
  • Run a vacuum over the exhaust fan occasionally to clear away dust and debris.

Comparing Popular Microwave Oven Brands

When selecting a microwave oven, it’s important to consider various brands for their reputation, customer feedback, and value. Although we won’t name specific brands, analyzing general trends within the microwave oven market can guide your decision-making process.

Brand Reputation and Customer Reviews

Researching customer reviews and expert opinions can provide insight into brand reliability. Look for brands known for their durability, after-sales service, and customer support. Brands that receive high ratings for safety and user experience often reflect a commitment to quality.

Warranty and Support Options

A solid warranty policy is indicative of a trustworthy product. Brands that offer extended warranties or free service options can reduce the long-term cost of ownership. Consider warranties that cover parts and labor to ensure peace of mind.

Value for Money Analysis

Consider the features offered versus the price point. A higher-priced model may deliver more advanced technology or durability, while more affordable options might lack certain features but still serve basic needs. Conduct a feature-by-feature assessment to find the best overall value.

Frequently Asked Questions About Microwave Ovens

Can I use metal in a Microwave Oven?

No, using metal in a microwave can cause sparks and potentially start a fire. Always opt for microwave-safe glass or ceramic containers.

How do I clean my Microwave Oven?

Mix water with vinegar in a microwave-safe bowl, heat until steamy, then wipe down surfaces with a damp cloth to remove stains and odors.

What is the ideal wattage for a Microwave Oven?

The ideal wattage for most households is between 800 and 1000 watts. Higher wattage leads to faster cooking times.

Are there energy-efficient Microwave Oven options?

Yes, many modern microwave ovens come with energy-saving features like eco modes that reduce power consumption during standby.

What safety features should I look for?

Look for safety features like child locks, automatic shutoff, and door seals that prevent leaks, enhancing overall safety during use.

Posted on

Elevate Your Bathroom Experience with a Sunny Shower Design

Experience relaxation with a sunny shower showcasing a modern glass enclosure and stylish fixtures.

Understanding the Concept of a Sunny Shower

Defining the Sunny Shower Experience

The sunny shower is not just a shower; it embodies a refreshing, rejuvenating experience that bridges your indoor space with the natural world. Imagine stepping into a shower flooded with natural light, the warmth of the sun enveloping you, turning an everyday routine into a blissful escape. The concept itself focuses on maximizing sunlight in the shower area, enhancing both the aesthetic and therapeutic qualities of this essential space in your home.

Key Features of a Sunny Shower

A well-designed sunny shower incorporates several key features that contribute to its unique experience. Firstly, ample windows or skylights are essential, allowing natural light to flow in freely. Next, the materials used, often light-colored or reflective, help amplify sunlight, creating a vibrant atmosphere. The layout should also cater to a seamless connection between indoor and outdoor spaces, possibly including open-air elements that immerse you in your surrounding environment.

Benefits of a Sunny Shower Design

Aside from the aesthetic allure, the sunny shower offers numerous health benefits. Regular exposure to natural light can significantly enhance your mood and energy levels. It supports vitamin D production, which is crucial for bone health and immune function. Furthermore, the calming effect of sunlight has been proven to reduce stress, making your bathing experience not just about hygiene, but also about holistic well-being.

Designing Your Own Sunny Shower

Essential Materials for a Sunny Shower

When designing a sunny shower, the choice of materials can profoundly influence the overall experience. Consider using glass for shower enclosures; it allows light to filter through while creating a sense of openness. Additionally, select light-colored tiles for the flooring and walls, as they reflect sunlight, enhancing brightness. Integrating natural stones, such as limestone or marble, can provide a luxurious feel and durability. Lastly, showcasing decorative elements like bamboo or teak can complement the natural theme.

Layout Ideas for Optimal Sunlight

Strategic placement is crucial for maximizing sunlight in a sunny shower. A corner shower layout with large windows can create a bright, open feel, while an overhead skylight ensures that sunlight pours in from above, reducing reliance on artificial lighting. Consider positioning your shower against an external wall with windows or glass panels to connect with the outdoor environment. This configuration not only enhances light exposure but also provides an inviting view of nature, creating a more serene setting.

Incorporating Nature: Plants and Accessories

Integrating natural elements into your sunny shower design can elevate its aesthetic and provide additional health benefits. Selecting moisture-loving plants, such as ferns or peace lilies, can bring life to the space while improving air quality. Use accessories like bamboo shelves or stone accents to mirror natural themes. Opt for organic shower products and decorative elements in earthy tones, helping maintain harmony with the surrounding ecosystem and choosing sustainable, eco-friendly materials whenever possible.

Enhancing Your Sunny Shower Experience

Choosing the Right Shower Fixtures

The fixtures you select for your sunny shower should enhance both functionality and aesthetics. Opt for high-quality, water-efficient showerheads that provide a refreshing experience while saving water. Consider fixtures with a matte finish that complements your design, maintaining a natural feel. Rain showerheads can offer an immersive experience reminiscent of bathing in nature, further enhancing the therapeutic qualities of your sunny shower.

The Importance of Lighting in Shower Design

While sunlight is crucial, consider supplemental lighting for those times when natural light isn’t sufficient. Install dimmable LED lights to adjust the mood according to your preference — from bright and invigorating during the day to soft and relaxing during your evening rituals. Additionally, positioning lights to highlight specific design elements or fixtures can create an inviting atmosphere and magnify the overall experience of your sunny shower.

Creating a Spa-Like Atmosphere

Transform your sunny shower into a spa-like retreat by incorporating personal touches that soothe the senses. Aromatherapy diffusers can fill the air with calming scents, while soft towels and bath mats provide comfort. Consider integrating features like a built-in bench or shelving for bath essentials, encouraging relaxation. Furthermore, play soft, ambient music to enhance tranquility, making your shower not just a necessity, but a cherished part of your daily self-care routine.

Maintenance Tips for a Sunny Shower

Cleaning and Care for Shower Glass

Maintaining the pristine condition of your shower glass is vital for preserving the sunny ambiance. Use a daily cleaner or a mixture of vinegar and water to wipe down the glass after each use, preventing hard water stains from forming. Regular deep cleaning with a non-abrasive solution can help maintain the clarity of the glass while preserving its longevity. Consider applying a water-repellent coating to reduce the frequency of cleaning needed.

Preventing Mold in Your Shower Space

Humidity is the enemy of any shower space, especially one designed to be a sunny retreat. To prevent mold growth, ensure proper ventilation with an exhaust fan or open windows after use. Incorporate porous materials cautiously and ensure they’re treated to resist moisture. Using an anti-mold paint or sealant on walls can further enhance protection. Regularly inspect grout lines and seal them as needed to avoid dampness entrapment.

Routine Maintenance for Longevity

Establishing a cleaning and maintenance routine can prolong the life of your sunny shower. Make it a habit to check for leaks, ensure fixtures are in working order, and remember to replace any worn-out components timely. Inspecting caulking and grout can prevent water damage that may affect structural integrity. Furthermore, scheduling periodic professional maintenance checks will help you identify potential issues before they escalate, ensuring your sunny shower remains a tranquil escape.

Frequently Asked Questions about Sunny Showers

What is a sunny shower?

A sunny shower refers to a shower design that maximizes natural light, creating a bright and inviting bathing experience. This involves using large windows, skylights, and light-reflective materials.

How to maximize sunlight in my shower?

To maximize sunlight, incorporate large or strategically placed windows and skylights. Use light-colored surfaces and clear glass for enclosures to enhance brightness.

What materials are best for a sunny shower?

Light-reflective materials like glass and light tiles are ideal for sunny showers. Natural stones can also add aesthetic value while maintaining durability.

Are plants safe in a shower environment?

Yes, moisture-loving plants like ferns thrive in humid shower environments, providing aesthetic appeal and improving air quality without maintenance issues.

How do I care for my shower fixtures?

Caring for shower fixtures involves regular cleaning with mild soap and vinegar, inspecting for leaks, and replacing worn components to maintain functionality and aesthetics.

Posted on

Enhancing Your Bathroom Aesthetic with Elegant Shower Doors

Showcasing elegant shower doors with clear glass and sleek design in a modern bathroom setting.

Understanding Elegant Shower Doors

Definition and Types

Elegant shower doors are more than just functional elements in a bathroom; they serve as a central design feature that can elevate the aesthetics and overall ambiance of the space. These doors come in various styles and materials tailored to numerous preferences and bathroom configurations. The most common types include:

  • Frameless Shower Doors: Known for their minimalist appeal, frameless doors create an open and airy feel while offering easy access and maximum visibility.
  • Hinged Shower Doors: These doors swing open outward and are typically mounted on pivot hinges, providing a classic look and robust function.
  • Sliding Shower Doors: Ideal for tighter spaces, sliding doors allow for easy entry without requiring additional space when opened.
  • Bi-Fold Shower Doors: These compact and space-saving designs fold against the wall when opened, making them suitable for small bathrooms.

Benefits of Choosing Elegant Shower Doors

Opting for elegant shower doors presents numerous advantages that enhance both the functionality and aesthetics of your bathroom:

  • Visual Appeal: Their stylish designs can improve the overall look of the bathroom, giving it a modern and sophisticated touch.
  • Durability: High-quality materials ensure longevity and resistance to wear and tear, making elegant shower doors a worthy investment.
  • Space Optimization: With designs that cater to various layouts, these doors are perfect for maximizing the use of space, especially in smaller bathrooms.
  • Easy Maintenance: Many elegant shower doors are designed to minimize water spots and soap scum, making cleaning simpler and more efficient.

Key Features to Look For

When selecting elegant shower doors, consider the following features to ensure they meet your needs:

  • Glass Thickness: Opt for at least 1/4 inch tempered glass for added strength and safety.
  • Hardware Quality: Stainless steel or brass fixtures are ideal for longevity and corrosion resistance.
  • Seamless Edges: Smooth, polished edges not only enhance safety but also contribute to a sleek appearance.
  • Water Repellent Coatings: These coatings help keep the glass clear, reducing the frequency of cleaning needed.

Choosing the Right Style for Your Bathroom

Modern vs. Traditional Designs

Choosing the right style of elegant shower doors depends heavily on your overall bathroom aesthetic. Modern designs often favor simple lines, minimal frames, and clear glass to create an open feel. In contrast, traditional designs may include more elaborate framing, typically featuring intricate glass patterns or finishes.

Complementary Color Schemes

Color schemes significantly influence the visual harmony of your bathroom. Whether you prefer bold contrasts or soft, muted tones, the finish of your shower door can complement or contrast effectively with your bathroom palette. For a cohesive look, consider matching the metal finishes of your shower door hardware with faucet and lighting fixtures.

Incorporating Accessories

Accessories enhance the functionality and aesthetic appeal of bathroom spaces. Hooks for towels, wall-mounted shelves, and decorative plants can infuse personality into your bathroom while making the area practical and welcoming. Opt for accessories that coordinate well with the elegant shower doors to maintain a sense of unity in design.

Installation Considerations for Elegant Shower Doors

Professional vs. DIY Installation

While installing elegant shower doors can be a DIY project, hiring a professional may be advisable, particularly for frameless or complex designs. Professionals ensure precise measurements and proper fitting, which is crucial for functionality and aesthetics. If you opt for DIY, ensure you follow manufacturer instructions carefully to avoid potential problems.

Necessary Tools and Materials

For DIY installation, you will need a variety of tools and materials, including:

  • Stud finder
  • Drill and drill bits
  • Screwdriver
  • Tape measure
  • Level
  • Silicone sealant

Common Installation Mistakes to Avoid

When installing elegant shower doors, certain pitfalls can jeopardize the integrity and appearance of the installation. Key mistakes include:

  • Improper measurements leading to misaligned doors.
  • Insufficient support for heavy glass resulting in sagging over time.
  • Poor sealing, leading to leaks and potential water damage.

Maintaining Your Elegant Shower Doors

Cleaning and Care Tips

Maintaining the clarity and shine of elegant shower doors requires regular care. Here are some tips:

  • Use a non-abrasive cleaner specifically designed for glass.
  • Wipe down the doors after each use to prevent soap scum build-up.
  • For tough stains, consider using a mixture of vinegar and water as a natural remedy.

Preventing Common Issues

Regular maintenance can prevent many common issues faced by shower doors, such as:

  • Ensuring the hinges are tightened to prevent door sagging.
  • Replacing worn-out seals promptly to avoid leaks.
  • Regularly checking for rust or corrosion, especially in metal components.

When to Call a Professional

While you can handle many maintenance tasks, some situations warrant professional help, including:

  • Persistent leaks that—despite regular sealing—continue to cause problems.
  • Severe damage or cracks in the glass requiring replacement.
  • Issues with door operation that arise from faulty hinges or tracks.

Frequently Asked Questions about Elegant Shower Doors

What are the different types of elegant shower doors?

There are sliding, bi-fold, hinged, and frameless shower doors to choose from, each offering different styles and functionalities.

How do I take care of my elegant shower doors?

Regular cleaning with non-abrasive cleaners and wiping down after each use helps maintain clarity and sheen.

Are elegant shower doors suitable for all bathrooms?

Yes, they can enhance both small and large bathrooms, providing more light and a feeling of space.

What materials are best for elegant shower doors?

Tempered glass is commonly used for its durability and safety features, along with high-quality hardware like stainless steel.

What common problems can arise with shower doors?

Issues include poor sealing, water leakage, and rust on metal components, but regular maintenance can mitigate these problems.

Posted on

Expert Carpet Cleaners Lincoln CA: Enhance Your Home’s Cleanliness Today

Engaging carpet cleaners Lincoln CA at work in a bright, tidy living room.

Understanding Carpet Cleaners Lincoln CA

When it comes to maintaining the beauty and longevity of your carpets, choosing the right carpet cleaners lincoln ca becomes an essential task. Carpets are not just decorative pieces; they contribute significantly to the ambiance and comfort of your home. In this guide, we will explore what defines quality carpet cleaning, common methods, and the benefits of hiring professionals in Lincoln, CA.

What Defines Quality Carpet Cleaning?

Quality carpet cleaning goes beyond mere surface cleaning. It involves a thorough process designed to remove dirt, allergens, and stains from deep within the carpet fibers. Some key aspects include:

  • Effective Equipment: High-grade tools and machinery help in deep cleaning carpets much better than conventional vacuum cleaners.
  • Eco-Friendly Products: Using biodegradable and non-toxic cleaning solutions ensures your family and pets remain safe while maintaining the carpets’ integrity.
  • Trained Professionals: Experts in carpet cleaning are knowledgeable about different types of carpets and stains, ensuring effective treatment methods.
  • Attention to Detail: A quality cleaner will inspect your carpet before starting and tailor the cleaning process to the specific needs of the material and condition.

Common Carpet Cleaning Methods Explained

There are several techniques employed in carpet cleaning, each suited for specific needs. Let’s explore the most common methods:

  • Steam Cleaning (Hot Water Extraction): This method uses hot water and cleaning solutions to agitate dirt particles, which are then extracted via powerful suction. It’s effective for deep cleaning and sanitizing carpets.
  • Dry Cleaning: Often recommended for delicate fibers, this method involves applying a dry cleaning solvent, which encapsulates dirt for easy vacuuming. It’s quicker, as no drying time is required.
  • Shampooing: This process involves applying a foamy shampoo to carpets before scrubbing it in and rinsing away dirt. However, it’s less common due to potentially leaving residues.
  • Bonnet Cleaning: Primarily used in commercial settings, this method employs a rotating brush with a cleaning solution to clean the carpet surface effectively.
  • Encapsulation: In this relatively new method, synthetic detergents form crystals around dirt particles, which can be vacuumed away. It offers a fast-drying alternative with effective results.

Benefits of Hiring Carpet Cleaners in Lincoln CA

Investing in professional carpet cleaning services provides various benefits that DIY methods often cannot match:

  • Time Savings: Professional carpet cleaners carry out the job quickly and efficiently, freeing your schedule for other important tasks.
  • Improved Air Quality: Regular cleaning eliminates allergens and pollutants trapped in carpet fibers, ensuring a healthier home environment.
  • Expertise and Knowledge: Professionals know which techniques and products work best for the type of carpet you have, optimizing the cleaning process.
  • Prolonged Carpet Life: Regular professional cleaning helps to maintain the integrity of your carpets, extending their lifespan significantly.
  • Stain Removal: Professionals have specialized techniques for addressing tough stains that you might struggle with using home remedies.

Choosing the Right Carpet Cleaner

Key Features to Look For

Selecting a suitable carpet cleaner involves considering several crucial aspects:

  • Certification: Can they provide evidence of their professional training and certification?
  • Insurance: Make sure the service is fully insured to protect yourself from liabilities in the event of accidents.
  • Methodology: Inquire about the cleaning methods they use. Are they modern and safe for your carpets and home environment?
  • Customer Service: A responsive customer service approach helps you address questions and concerns promptly.
  • Eco-Friendly Practices: If this is a priority, find a cleaner that uses green products and sustainable processes.

Comparative Costs of Carpet Cleaning Services

The cost of carpet cleaning services can vary based on several factors, including:

  • Room Size: The size of the area being cleaned directly affects pricing. Larger areas will naturally incur higher costs.
  • Carpet Type: Delicate fibers may require specialized treatments, influencing the overall pricing.
  • Location: Costs might vary slightly for different neighborhoods or areas, depending on local market conditions.
  • Additional Treatments: Stain removal, carpet protection treatments, or deodorization will add to the expense.

On average, expect to pay between $25 to $75 per room for professional cleaning services in Lincoln, CA. Always request a detailed estimate before agreeing to services.

Customer Reviews: What to Expect

Reviews and testimonials from previous clients can be invaluable in your decision-making process. Look for:

  • Consistency: Do multiple reviews highlight the same strengths or weaknesses?
  • Response to Complaints: How do companies handle negative feedback? Their response can speak volumes about their service quality.
  • Detailed Insights: Inquire for reviews that mention specific experiences, providing a clearer picture of their reliability.

DIY vs. Professional Carpet Cleaning

When to Opt for DIY Solutions

DIY carpet cleaning can be an excellent option in certain circumstances, such as:

  • Light Maintenance: Regular upkeep against dust and minor spills can often be effectively managed using a vacuum or spot cleaner.
  • Cost Constraints: When budgets are tight, DIY methods can be a cost-effective interim solution, especially for smaller areas.
  • Known Stains: If you’re dealing with a familiar stain, home remedies may suffice for effective removal.

Limitations of Home Cleaning Methods

While DIY options offer benefits, they come with notable limitations:

  • Inadequate Tools: Typical home equipment lacks the power and efficacy of professional-grade machinery.
  • Skill Requirement: Effective cleaning often relies on experience and technique, which DIY enthusiasts may lack.
  • Drying Time: Poor methods can lead to excessive moisture, promoting mold growth if carpets don’t dry properly.

Advantages of Professional Expertise

Engaging professionals for carpet cleaning introduces numerous advantages:

  • Deep Cleaning: Professionals use heavy-duty equipment able to extract deeply embedded dirt and allergens.
  • Advanced Techniques: Knowledge of various cleaning methods lets them apply the best one for your carpet’s unique needs.
  • Time and Convenience: They handle labor-intensive tasks, allowing you to focus on your daily life.

Maintaining Your Carpets Post-Cleaning

Effective Care Tips for Long-Lasting Results

To maximize the benefits of professional carpet cleaning, follow these care tips:

  • Avoid Vacuuming Wet Carpets: Wait until carpets are completely dry to prevent damage to the fibers and vacuum cleaner.
  • Regular Maintenance: Vacuum regularly and make spot cleans immediately when spills occur to prolong carpet health.
  • Use Furniture Coasters: Protect carpets from indentations and wear by placing coasters under furniture legs.

How Often Should You Clean Your Carpets?

The frequency of professional carpet cleaning depends on several factors:

  • Traffic Levels: High-traffic areas may need cleaning every 6 months, while low-traffic zones can last longer.
  • Presence of Pets: Homes with pets typically require more frequent cleanings due to fur and stains.
  • Allergies: If you have allergies, consider at least annual professional cleanings to manage allergens effectively.

Common Mistakes to Avoid After Cleaning

Ensure you don’t fall into these post-cleaning traps:

  • Walking on Wet Carpets: Avoid walking on carpets until they are fully dry to prevent resoiling.
  • Ignoring Stains: Handle any new stains swiftly to increase the chance of complete removal.
  • Using Too Much Water: Overly wet carpets can develop mold and mildew, significantly deteriorating their quality.

FAQs About Carpet Cleaners Lincoln CA

What is the average cost of carpet cleaning?

The average cost ranges from $25 to $75 per room, depending on various factors like size and carpet type.

How long does it take for carpets to dry?

Typically, carpets may take anywhere from 4 to 24 hours to dry, depending on factors like humidity and airflow.

Can carpet cleaners remove tough stains?

Yes, professional carpet cleaners are trained to handle a wide range of tough stains using specialized techniques and equipment.

Is professional carpet cleaning safe for pets?

Most professional carpet cleaning services use non-toxic, pet-safe products, making it generally safe for your furry friends after cleaning.

What products do carpet cleaners use?

Professional cleaners utilize a variety of specially formulated cleaning solutions, including mild detergents for freshening and stain removal.

Posted on

Effective Carpet Cleaning Near Me: Tips for a Cleaner Home

Enhance your space with top-notch carpet cleaning near me service in a cozy setting.

Understanding Carpet Cleaning Near Me

Whether you’re faced with a stubborn stain, lingering odors, or just general wear and tear, knowing how to access effective carpet cleaning services is crucial. Many homeowners search online for carpet cleaning near me, which reflects a desire for local, reliable options. Understanding what local services offer is essential to making an informed choice for your carpet cleaning needs.

Importance of Local Services

Choosing a local carpet cleaning service has multiple advantages. Firstly, local providers often have strong ties to the community and a vested interest in their reputation. They are more likely to prioritize customer satisfaction and can offer tailored solutions based on the unique carpet concerns specific to your area.

Moreover, local services can respond quickly to inquiries and provide emergency services. In a time-sensitive situation where a carpet cleaning might be necessary due to unexpected spills or stains, the ability to receive quick attention can be a significant benefit.

Choosing the Right Provider

With numerous options available, selecting the right carpet cleaning provider can be overwhelming. Start by researching user reviews, testimonials, and before-and-after photos. This gives insight into the quality of work provided by different companies.

Additionally, ask about their methods, types of cleaning solutions used, and whether they have specialized services for specific issues, such as pet odors or high-traffic areas. Make sure they use environmentally-friendly products if this is an important factor for you.

Benefits of Professional Cleaning

The benefits of hiring a professional carpet cleaning service are manifold. Firstly, experts possess knowledge and equipment that the average homeowner typically does not. From hot water extraction to specialized stain removal tools, professionals have access to advanced technology that ensures a deeper clean.

Furthermore, deep cleaning by professionals can significantly extend the life of your carpets. Regular maintenance not only removes dirt and stains but also helps to preserve the integrity of the carpet fibers, providing a better return on investment.

Popular Carpet Cleaning Methods

Hot Water Extraction

Hot water extraction, often referred to as steam cleaning, is one of the most widely used carpet cleaning methods. This technique involves injecting hot water along with detergent into the carpet fibers at high pressure. The hot water breaks down dirt and debris, which is then extracted with powerful vacuums.

This method is highly effective for removing stubborn stains and allergens, making it a popular choice for households with pets and children. The high temperature also aids in killing dust mites and bacteria, contributing to a healthier living environment.

Dry Carpet Cleaning

Dry carpet cleaning is an innovative method that uses specialized cleaning compounds to attract dirt and stains without the use of water. This method is advantageous for individuals looking to avoid the long drying times associated with traditional cleaning methods.

The process typically involves spreading a dry cleaning compound across the carpet and then agitating it with a machine which breaks down dirt embedded in the fibers. Afterward, the compounds are vacuumed away, revealing a clean and dry carpet almost immediately.

Steam Cleaning Techniques

Steam cleaning involves the use of vaporized water to clean and sanitize carpets effectively. This method is not only effective in removing stains and dirt but also in sanitizing surfaces. The steam penetrates deeply into carpet fibers, loosening debris that can lead to odors or decay.

Steam cleaning is particularly helpful for carpets that experience heavy traffic as it rejuvenates the fibers, restoring their original appearance. Many homeowners choose this method for its eco-friendliness since it often requires fewer chemicals than other cleaning methods.

How to Prepare for Carpet Cleaning

Clear the Area

Preparation is key to maximizing the effectiveness of any carpet cleaning session. Begin by clearing the area of furniture, rugs, and other items. This not only makes the task easier for the technicians but also ensures that every inch of carpet is thoroughly cleaned.

If furniture cannot be moved, be sure to lift items rather than dragging them, as this could damage the carpet fibers. Consider utilizing coasters or protective sheets to avoid damage during the cleaning process.

Identify Stains

Before the cleaning process begins, identify and highlight any stains or trouble spots. This proactive measure ensures that the cleaning team can use specific treatments tailored to those areas, yielding better results.

Providing the service team with information about the nature of the stains—whether food, wine, or pet-related—allows them to select the most appropriate cleaning methods and solutions, ensuring a more effective cleaning process.

Choosing the Right Cleaning Solutions

When scheduling carpet cleaning, you may be given a choice of cleaning solutions. It is advisable to discuss with your service provider about the different products used in the cleaning process, particularly if you have concerns about allergens or chemicals.

Opt for eco-friendly options whenever possible, especially if you have children or pets in the home. Many providers now offer organic alternatives that are both effective and safe.

Maintaining Clean Carpets After Treatment

Regular Vacuuming Practices

After your carpets have been professionally cleaned, maintaining their cleanliness through regular vacuuming is essential. Aim to vacuum high-traffic areas at least twice a week, whereas lower-traffic areas can be vacuumed once a week.

Using a vacuum cleaner with strong suction and a HEPA filter can trap dust and allergens, prolonging the life of your carpet and maintaining a clean environment.

Dealing with Spills Quickly

Address spills and stains promptly to minimize damage. Blot, don’t rub, the area with a clean cloth and apply a suitable stain remover when needed. The quicker you attend to spills, the better your chances of avoiding permanent stains.

If unsure about how to handle a specific stain, refer to cleaning guides or consult with your professional cleaning service for advice on the best course of action.

Scheduling Professional Cleanings

Establishing a regular cleaning schedule will help ensure that your carpets remain in good condition. Typically, it is recommended to have carpets professionally cleaned every 6 to 12 months depending on usage patterns. Homes with pets or children may benefit from more frequent cleanings, while less trafficked areas could require less often.

By making a schedule and sticking to it, you can avoid building up dirt and grime, prolonging the appearance and longevity of your carpet.

Frequently Asked Questions About Carpet Cleaning Near Me

What is the average cost of carpet cleaning?

The average cost varies by location but typically ranges from $100 to $250, depending on carpet size and cleaning methods used.

How often should I clean my carpets?

It is recommended to clean carpets every 6-12 months, with more frequent cleanings for high-traffic areas or homes with pets.

Can I clean my carpets myself?

Yes, but professional cleaning is often more effective for addressing deep stains and odors than DIY cleaning methods.

Will carpet cleaning remove pet odors?

Yes, professional cleaning can effectively eliminate pet odors along with stains, rejuvenating your carpet.

How long does carpet cleaning take?

The cleaning process usually takes 20 minutes to an hour per room, depending on the size and cleaning method used.